Hiking The Majestic Lost City in Colombia promises an unparalleled experience for avid hikers, history lovers and adventure seekers. The Lost City, also known as Cuidad Perdida is situated in the heart of the Colombian Sierra Nevada Mountains. It is an ancient archaeological treasure hidden amidst lush landscapes, jungles, rivers and steep terrains. Join me as I take you through this adventurous 4 day itinerary. We will immerse in the breathtaking beauty and cultural richness of this remote destination.


But first, a little history. The indigenous known as the Tyronas built this city in 800 AD making it centuries older than the more famous Machu Picchu in Peru. The ancient city was rediscovered in 1972 by a group of treasure hunters led by a local farmer Florentino Sepúlveda. Upon discovery, the Colombian government and local authorities took measures to protect and preserve the site. In the following years efforts were made to facilitate guided tours and controlled access to The Lost City. This allowed visitors to explore this ancient archaeological wonder while minimizing environmental impact and preserving the site’s historical integrity. By the early 1980s the land was ready for tourism.
Indigenous Land
It’s important to point out that the indigenous people have been living in The Lost City since it was built. Primarily the Kogi, Arhuaco, Wiwa, and Kankuamo. When it was rediscovered the government worked with these groups on a compromise to bring in tourism in. It was decided that much of the surrounding mountains would remain indigenous land, and The Lost City would open up to tourism. This displaced many of their homes making way for hiking paths and accommodations. There is a certain time every year when Ciudad Perdida closes to all tourism for cultural, ceremonial and environmental reasons.
Conflicts have arisen, and there are ongoing discussions about balancing the economic benefits of tourism. Their is a need to protect the cultural and environmental integrity of the area. It’s essential to approach such sites with sensitivity to the local communities’ needs and concerns. Tourism should be sustainable and respectful to indigenous people’s way of life. My tour group Expotur did a phenomenal job educating and preparing us for our time on the sacred land. There is so much to share, so let’s dive right in!


Expotur
I chose to trek with Expotur because they had excellent reviews online. A couple of things to note – you can choose to trek the same loop in 4, 5 or 6 days. I chose the 4 day / 3 night option as I knew I was in shape enough to hike at that speed. Also, I didn’t want to take extended time off of work. At the time I hiked (Dec 2023) the cost was around 100 USD per day. I’m going to be honest – this hike is hard (46 miles round trip). I suggest understanding your fitness level to decide if you are ready & how many days you want to do it in.
Pack List
Before we get into the glory, let’s chat pack list. Feel free to scroll down to ‘Day 1’ if you want to start reading about the hike. Expotur provided a fantastic pack list, and now I know how I would tweak it slightly. You want to strike a balance between having everything you need and keeping things light. Here’s my 4-day pack list with links to the items I loved.
If you do not wish to carry your backpack for whatever reason, you can hire a porter. If you do, your pack will be waiting for you at your evening camp. The fee to do this is quite nominal.
Disclaimer: Some of the links in this post are affiliate links, meaning that if you click through & make a purchase, we will receive a small commission at no extra cost to you.
Main Items
- 30L Backpack – this was a perfect size. You want a lightweight backpack that has a bit of padding on the shoulder straps. This one stuck a balance between price and quality
- 2 x Hike Shorts – I wore each pair for 2 days which worked out well. You can rinse your clothes in the rivers and hang them to dry at the camps.
- 2 x Tanktops – light and breathable.
- Hike Boots – we love these Oboz boots as they are stylish and support the ankle (women’s, men’s).
- 4 x Hiking Socks – if your hiking boot is a mid-height make sure your socks cover your ankles. This will help prevent rubbing and blisters.
- 4 x Underwear.
- 3 x Bras – 2 sports bras, 1 comfy bra for camp post-shower.
- Rain Jacket – I bought this one because it is very lightweight and folds neatly into a bag. We lucked out with no rain but that is not always the case (women’s, men’s).
- Long Sleeve Shirt – I liked starting the early mornings with this shirt over my tank top. It protected against the sun and is very light (women’s, men’s).
- Lightweight Cozy Pullover – you will enjoy this at camp in the evenings as it can get cool.
- Lightweight Camp Pants – it’s a real treat to put on clean pants in the evenings after showering. I love these as they are comfortable and weigh nothing, they have become my new ‘travel pants’ (women’s, men’s).
- Clean Shirt for Camp – having clean clothes after you shower is very rewarding. Saving the pants, shirt and a bra for post-shower is a luxury you can afford.
- Swim Suit – the river swims are everything.
Accessories & Extras
- Refillable Waterbottle – you can refill your water at the rest stops and camps. A few of the hikers in my group had this travel water bottle and loved it.
- Flip Flops – you will want these for showers and giving your feet a break from shoes at the camps.
- Shower Towel – I love these Turkish towels as they are fast drying, double perfectly for a blanket on the plane.
- Portable Charger – I kept my phone on airplane mode during the trek and just used it as a camera, charging it every couple of days. This power bank is the best as the cords are built-in. Also there is power at the camps you can use in the evenings.
- Sunglasses – obviously.
- Baseball Cap – I love traveling with a neutral hat that goes with everything.
- Headlamp – I mostly used my phone flashlight at night but was glad to have a headlamp as backup.
- Toiletries – your must haves essentials plus sunscreen and insect repellent (this one worked well!)
- Ear Pods & Ear Plugs – now and then it was groovy to play a pump-up song (lol). Earplugs would be helpful especially if you are going to bed earlier than others.
- Random Extras (b/c we extra 😝) – hydration tablets, these are full of electrolytes and work well. A few of your fave trail snacks. Having those comforts you love is lovely as the options are limited on the trail. Tea bags for cold brews while hiking. This was a nice switch from water, also I was less regular during the hike so I was glad I brought my digestive tea! TP, sometimes the bathrooms run out and other times you go al fresco.
- Colombian Pesos – take some cash with you as you can purchase snacks and drinks at the rest stops and camps. There are also bracelets and souvenirs along the road for sale.
*Pro Tip – I put my clean clothes in one ziplock and dirty ones in another to prevent cross-contamination 😉

Day 1
Day 1 started in Santa Marta which is a coastal town on the northern coast of Colombia along the Caribbean Sea. This is where trekkers start as the tourism companies have offices here. Expotur picked me up around 7a from my hotel and brought me to their offices downtown. Here I checked in and met the rest of my group. Each guided group can host up to 16 people, ours was a cohort of 11. They can store the rest of your luggage in a locked storage room while you trek.
Here we were introduced to our team made up of our expert guide – Elizabeth, our translator – José, ancillary help – Jhon and chef – Ernesto. After that, it was time to depart. A 2 ½ hour car ride in an outback vehicle takes you to the quaint village of Mamey. This is the starting and ending point of the trek. We enjoyed our first of many fantastic meals prepared by Chef Ernesto. It was then time to hit the trail!


The First Stretch
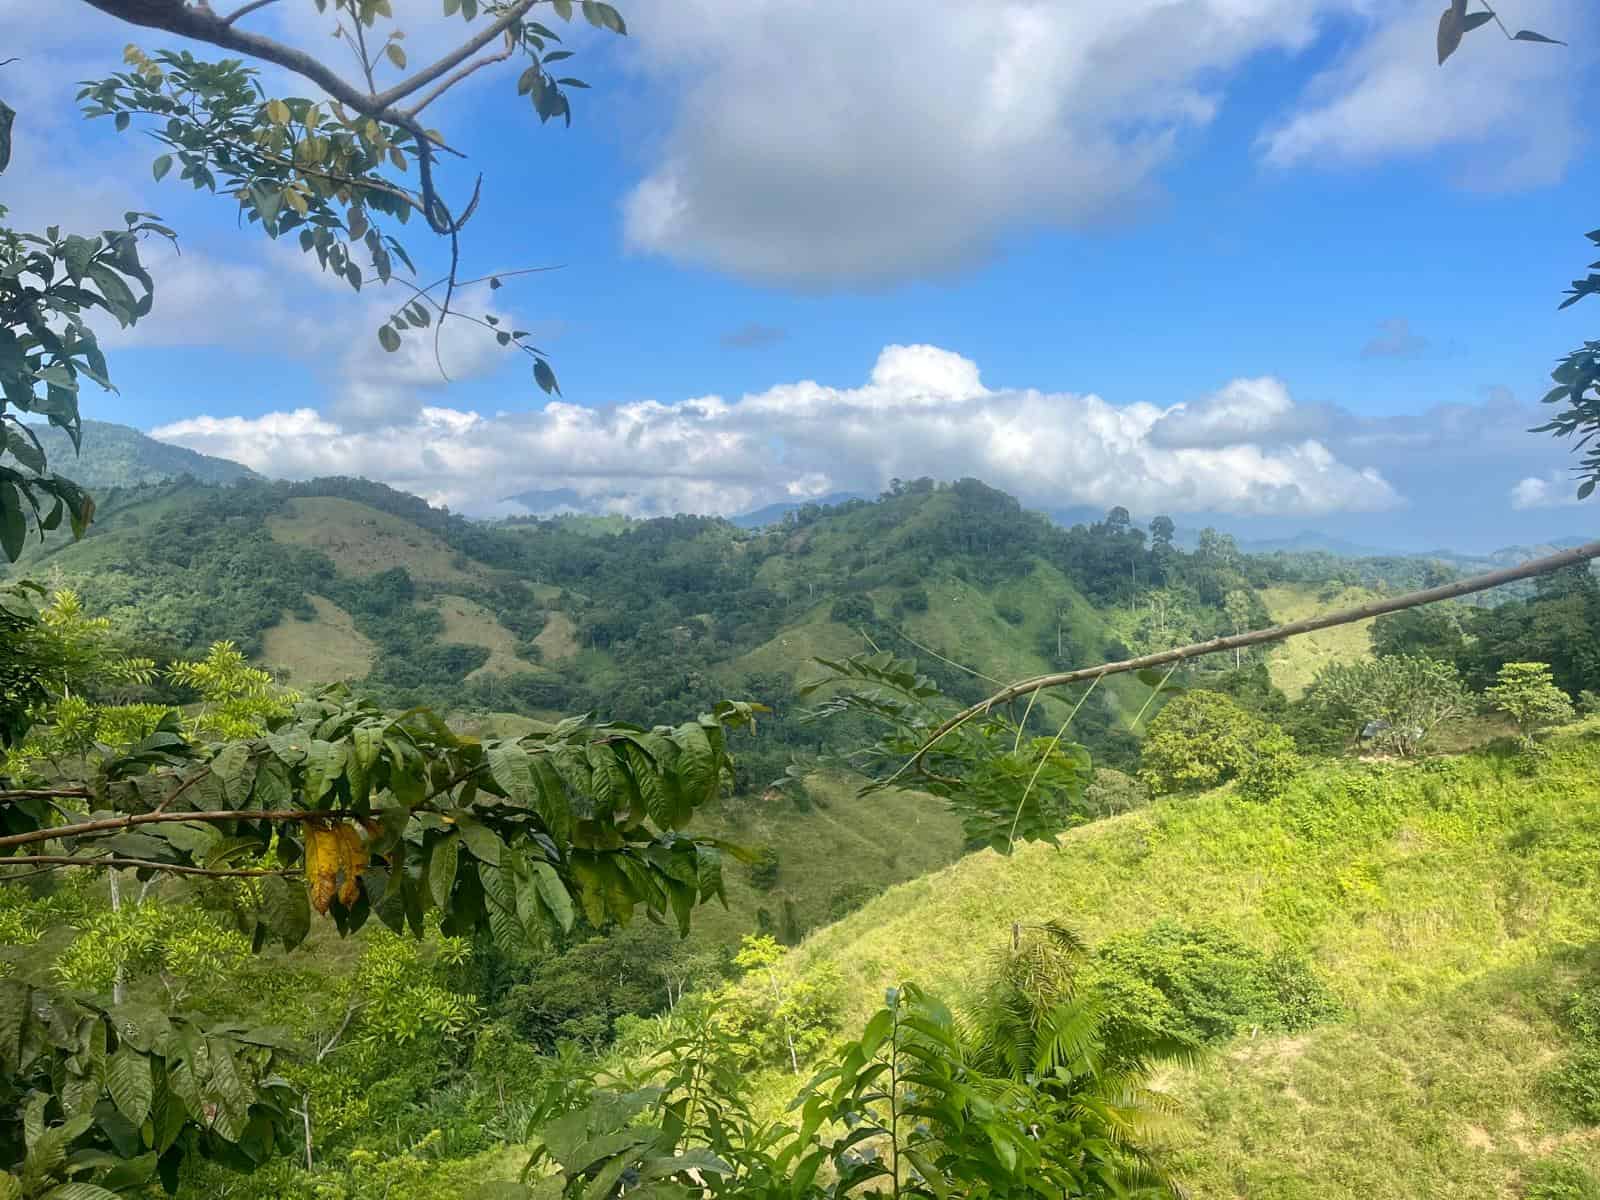
The first stretch was a 4 hour, 6.5 miles trek through open terrain, marked by uphill stretches and occasional descents. This set the tone for the hike as there were some very steep pushes within the first couple of hours. I remember thinking ok, time to get my mind right and activate that inner athlete! What’s fantastic is there are small rest points along the way with fresh fruit, beverages and sometimes toilets. These stops give you life and are very rejuvenating.
Adan Camp
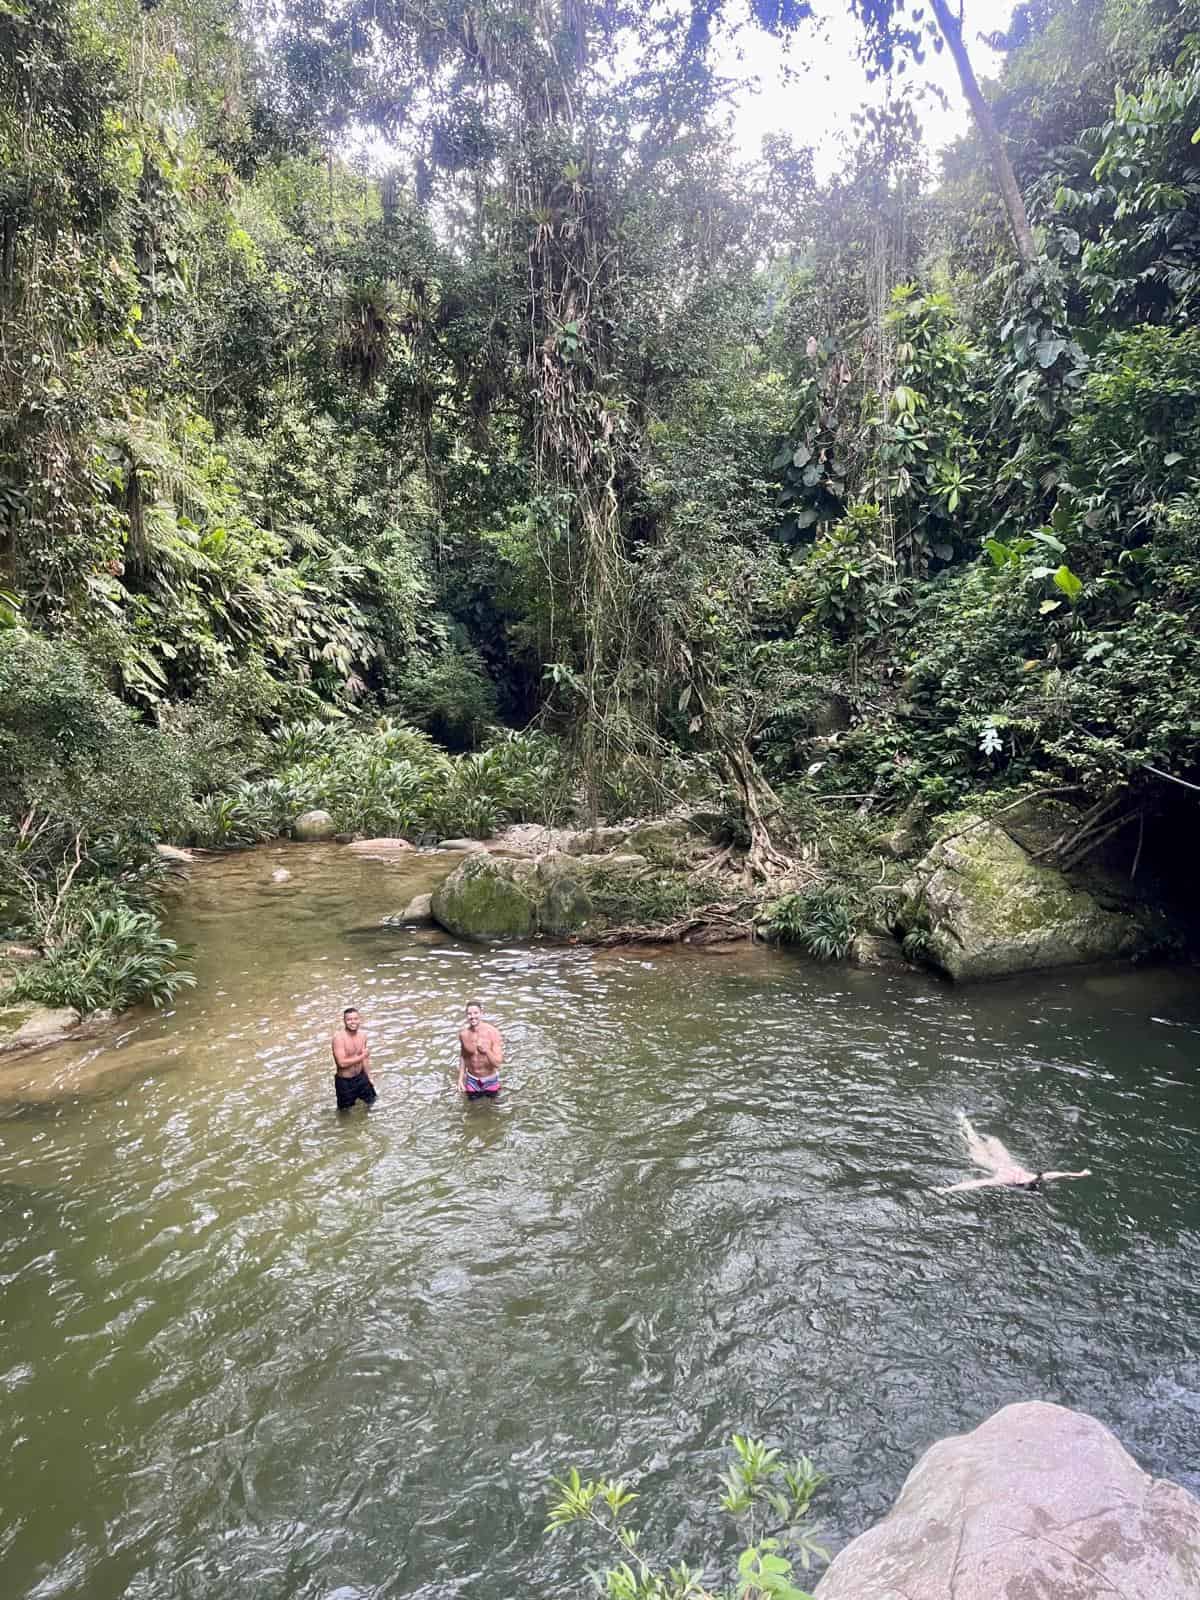
We arrived at Adan Camp just before sunset. Nestled in nature, this hideaway boasts a natural swimming pool which I fell in love with. It was incredibly refreshing and had a modest cliff jump for any takers. Next, we enjoyed showers and dinner. All the meals were very delicious and they were able to accommodate dietary restrictions. You can expect a variety of rice, beans, fish, meat, tofu, plantains, simple salads, pasta and sandwiches while on the trail.
Accommodation
Let’s set the expectation for accommodation during the trek. These camps are built into the lands of the jungle. They are rugged, simple, quite clean and equipped with the essentials (toilets, showers, beds, a kitchen and communal eating areas). They are not glamorous by any means, but they are comforting after a long day.
The beds are all bunk beds with mosquito nets. The mosquito nets are much needed, they are not for decoration! Each bed is equipped with a fresh pillow and sheets. I was grateful we did not have to hike with our bedding. Each camp had something unique that made it special. At Adan Camp, it was the natural swimming pool.


Day 2
On day 2 and every day thereafter we awoke at 5a to start hiking by 6a. This hour is plenty for brushing your teeth, putting on sunscreen and eating breakfast. It also treats you to amazing sunrises! I am not a breakfast person, but I always ate breakfast during this trek. It was so necessary based on the rate you are burning calories. Nobody likes a hangry hiker 😮💨
The first push of the day covered 5.5 miles over 4 hours through the Buritica River Valley, with a stop at the indigenous settlement of Mutanyi for cultural insights. We then progressed to Mumake camp for lunch and an optional dip in the river.


Paso Lorenza Camp
Post-lunch, the journey continues for another 5.5 miles over 4 hours. We trekked over river crossings, hanging bridges, ancestral trails and visited a Kogi village. The day concludes at Paso Lorenza Camp where a delightful dinner unfolds against the backdrop of the Buritaca River. This camp is special as it is located just before the base of The Lost City. At this point, there is a buzz of excitement as everyone knows tomorrow will prove all our hard work was worth it!


Day 3
Exploration of The Majestic Lost City
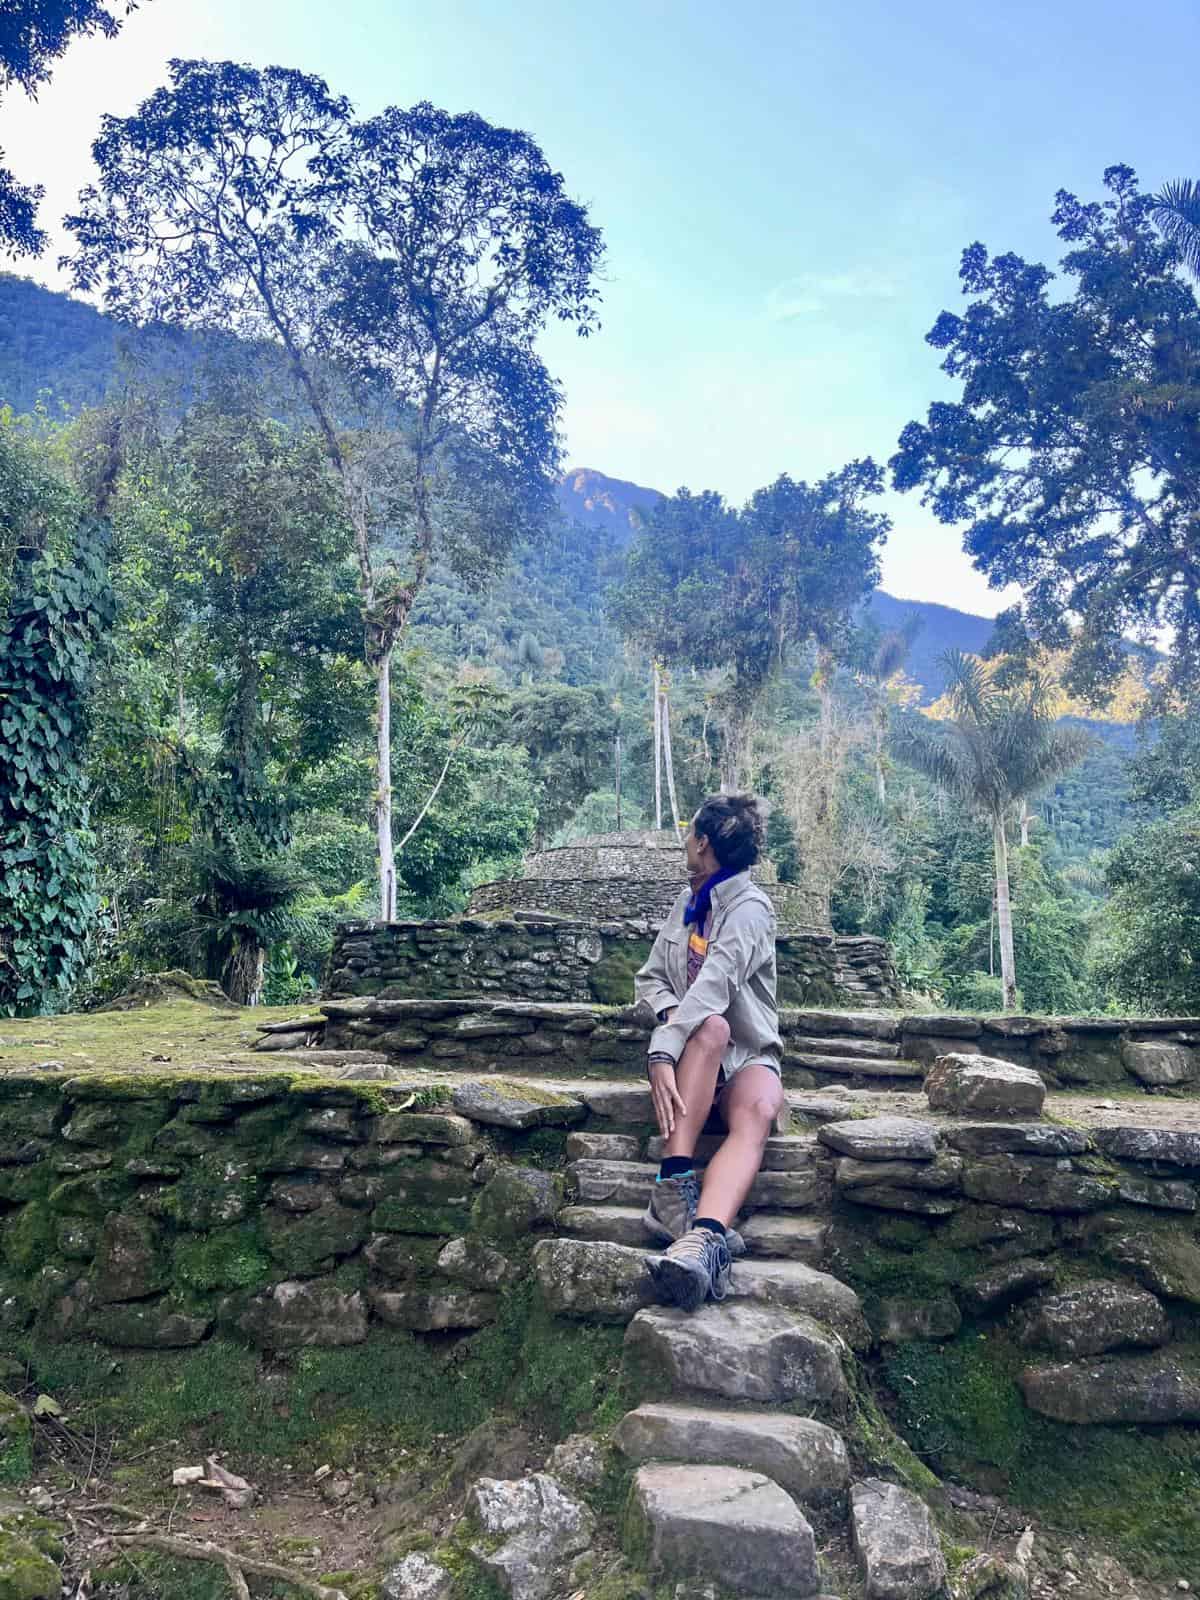
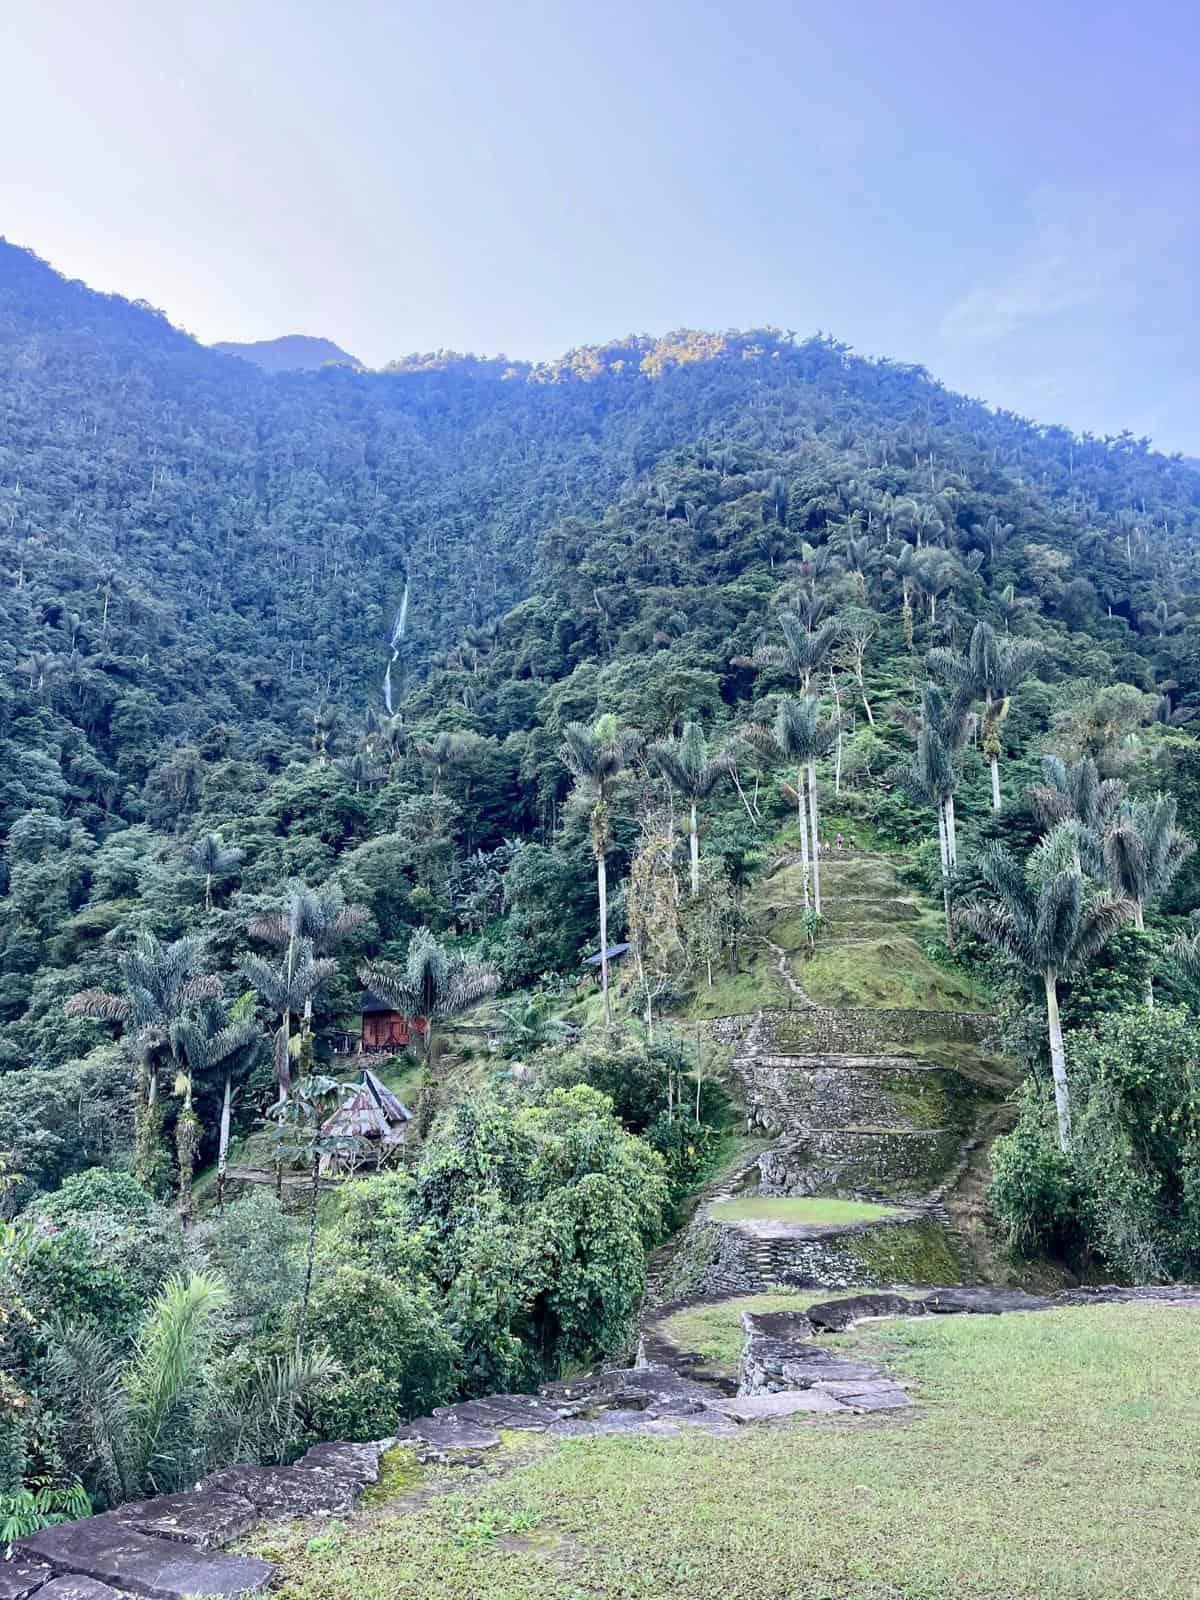
The third day promises a unique exploration of The Majestic Lost City. With a lighter backpack (leaving nonessentials at camp), you’ll trek 2.5 miles for 1½ hours around the river. Here you ascend 1,200 steps built by the ancient Tayrona Indians. Marveling at the terraces of the Lost City we spent 3 hours unraveling its archaeological wonders. Upon entering my mind was blown as I began to grasp how much time and work it took to build this city without modern machines or tools.
Elizabeth shared deep and enlightening history lessons as we explored the city with awe. We were lucky enough to be one of the first groups to enter the city that morning. This allowed for better pictures and an unforgettable sunrise. The sites and grounds were majestic. As I walked the grounds, I pictured the indigenous living there many years ago. I felt honored for the opportunity to take a peak into their history.

Back to Mukame
The second push of the day retraces the route (yep down all those steps). Returning to Paso Lorenzo Camp, it was time for lunch and backpack retrieval. Post-lunch, a 3-hour push brought us back to Mukame where we savored the river, rest and dinner.
*Pro Tip – my feet were SO tired after each day. Thank goodness I thought to soak them in the cold rivers in the evenings. I would cold plunge my feet for 30-45 minutes each day. This completely relieved my pain and gave my whole body and soul a rebirth. I am so grateful for those healing waters.


The Final Day
On the final day, you will recall familiar sites. There is one way in and one way out of The Majestic Lost City. The scenery is so wonderfully lush and beautiful that you will not mind the rerun. We stopped for a snack at Adam Camp, if you hustle you can dip in the magical natural pool again!
The uphill journey concludes as you reach Mamey, where it all began. I was so ready for this lunch, and candidly for the hike to be over. I love hiking and the outdoors, but I must be honest. After pushing at that rate, in that heat in the rugged jungle for 4 days, I was excited for a city and a hotel room!


Goodbye to The Majestic Lost City
Hiking The Majestic Lost City offers a captivating journey weaving through dense jungles, rivers, mountains and ascending challenging terrains. The 46-mile adventure unveils not only the awe-inspiring archaeological wonders but also the rich culture of the indigenous communities.
Every so often I love doing something that pushes me to my limit. It makes me feel alive and reminds me of what I am made of. This hike checked that box! As I traversed the landscapes and immersed myself in the stories of this ancient civilization, the experience became a testament to the delicate balance between preserving the past and embracing the present. All of this taking place in one Colombia’s most enchanting and hidden destinations.
I hope this post sparks your curiosity and leaves you considering a visit to Ciudad Perdida. As you know, we are always more than happy to answer any questions as supporting your travels is our passion.
Happy Trekking, Bekah
PS ~ If you have more time on the front or back end of your trek, we suggest visiting Colombia’s Caribbean coastal treasure, Cartagena. Catch that city guide here!